Nails of the Day: Blue Grey

Hi Hi! 😀

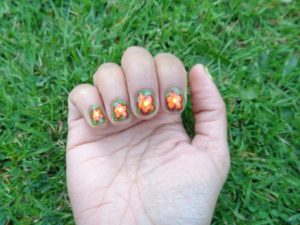
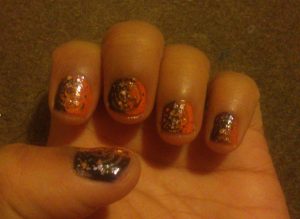
I randomly decided to paint my nails and this is the result.

I used Rita Ora’s Rimmel Girl in Grey,

Essence Holo Rainbow Holo Maniac (please click the link- https://theheartofnails.wordpress.com/2018/03/13/essence-holo-rainbow-nail-polish-review-holo-maniac)

and B. B. Quick Mermaid (please click the link-https://theheartofnails.wordpress.com/2015/03/03/b-b-quick-nail-polish-176-mermaid-review)

Share Your Thoughts! 😀

X x x

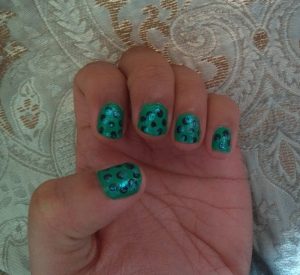
Nails of the Day!: Green Ladybird

Hi Hi!:D

I felt like a while since I did some nail-y stuff so here it is 😀green lady bird nails

green lady bird nails

I used Rimmel 60secs Super Shine Loosey Goosey Dancin’ as the base colour and I polka dotted using Rita Ora’s Rimmel Girl in Grey and then I polka dotted half on top using My Little Pony’s China Glaze Let Your Twilight Sparkle

Please click link for review:https://theheartofnails.wordpress.com/2018/01/23/china-glaze-my-little-pony-nail-polish-review-let-your-twilight-sparkle

Share Your Thoughts! 😀

X x x

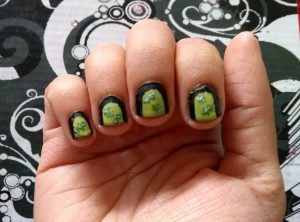
My Nail Art: Frankenstein Inspired Nails

Hi Hi! 😀

What you need: frankenstein nails

Basecoat

Topcoat

Black nail polish

2greens nail polishes or a slightly yellowy green nail polish

Silver nail polish

Matte Topcoat

Nail Art tools

What to do:

First step is the basecoat. I used two coats of Barry Ms Basecoat, Topcoat and Nail Hardener.

Wait to dry!

Apply the black nail polish. I used Seventeen Gel Colour Black Cat.

Wait to dry!

I then painted the middle of the nail all the way to the tip leaving a black outline using a yellow nail polish but you can use a slightly yellowy green or a regular green nail polish. I used Etude House Juice Recipe in Banana (https://theheartofnails.wordpress.com/2017/09/26/etude-house-juice-recipe-nail-polish-banana) I applied two coats.  

Wait to dry!

I used a nail art tool and a green nail polish to make the stitching. I used Etude House Handmade Jam in Green Tea.(https://theheartofnails.wordpress.com/2016/11/22/etude-house-handmade-jam-nail-polish-review-green-tea) At this stage I also tidied up the black outline around the nail while waiting for it to dry then I applied the silver on top of the green stitching. I used Rita Ora’s Rimmel Pedal to the Metal.

Last step is the Matte top coat. I used Barry Ms Matte Topcoat,

Done!! 😀

HAPPY HALLOWEEN! 😀 😀

Share Your Thoughts! 😀

X x x

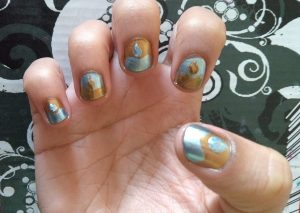
My Nail Art: Metallic Diwali

Hi Hi! 😀

Diwali is on its way this week and so I decided to do another manicure for it but I decided to go a slightly different way.

What you need:metallic diwali

Basecoat

Topcoat

Silver colour nail polish

Gold colour nail polish

Dotting tool/toothpicks/Nail art pen


First step is the basecoat. I am using Barry Ms Basecoat, Topcoat and Nail Hardener. I used two coats.

Wait to dry!

Next paint your nails alternating between your gold and silver nail polishes.  I am using Seventeen Quicker Slicker Fury. Click the link to see review-https://theheartofnails.wordpress.com/2017/10/10/seventeen-quicker-slicker-nail-polish-fury-review and Rita Ora’s Rimmel Pedal to the Metal.

Wait to dry!

Next make the candle holder. Using the brush that comes with your nail polish just swipe an angle halfway down your nail from the left to the bottom right corner and then halfway down again from the right to the bottom left corner. If you get confused see photo. Also remember to use the gold on the silver and silver on the gold nail polish.

The last bit is to add the flame and you can use whatever nail art tool that works best to make a tear drop shape. You can then add a top coat if you wish I chose to keep it the way it looked.

A message to anyone celebrating HAPPY DIWALI AND A  VERY HAPPY NEW YEAR!!!! 😀

Share Your Thoughts! 😀

X x x

My Nail Art: Dragon Eyes

Hi Hi! 😀

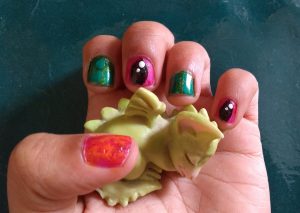
Well I just realised never did a dragon manicure so here it is. (Sleeping dragon not included ;0))Dragon eyes nails
What you need:

Topcoat

Basecoat

Green glitter nail polish

Dark pink (matte) nail polish

Green nail polish(yes another one)

Orange nail polish

Red nail polish

Black nail polish

White nail polish

Nail art brush/dotting tools


First step apply 2coats of your basecoat. I am using Barry Ms Super Mani 7 in 1 Nail Treatment.

Next using your dark pink nail polish and your glitter green nail polish paint alternate nails. I chose to have the pointer and the ring finger as the green ones. I used China Glaze Flying Dragon please click link for review-https://theheartofnails.wordpress.com/2017/05/30/china-glaze-nail-polish-review-flying-dragon and Seventeen Colour Carnival Green Gold Shimmer. Please click link for review- https://theheartofnails.wordpress.com/2016/09/13/seventeen-colour-carnival-nail-polish-review-green-gold-shimmer

Wait to dry!!

Thumb of Fire ;op

Obviously with a dragon you got to have some fire so for the thumb I have done this mix of orange red. I have used Rita Ora’s Rimmel 60secs Super Shine Tangerine Tent please click link for review-https://theheartofnails.wordpress.com/2015/04/07/rimmel-60-seconds-super-shine-by-rita-ora-nail-polish-tangerine-tent-review and I used Etude House Berry Delicious Strawberrry Souffle Strawberry Jam https://theheartofnails.wordpress.com/2016/10/04/etude-house-nail-polish-review-berry-delicious-strawberry-souffle-strawberry-jam-8. The best way for me to create the fire effect was to wipe of the nail polish on the side of the bottle as much as possible and just randomly dab the two colours. You could also use a makeup sponge and dap the nail polish that way if you prefer.

The pointer and ring finger dragon scales. I used a green nail polish and randomly splotched it on the nails to create a slight two tone effect of the scales. I used Seventeen Colour Carnival Emerald Green please click the link for the review-https://theheartofnails.wordpress.com/2016/05/31/colour-carnival-by-seventeen-review-emerald-green

The last two nails are the dragon eyes. I first used the red nail polish and a nail art brush and tried to create some blood vessels in the eyes.

Wait to dry!

Using a nail art brush outline the shape of an almond for the pupil of the eye. Then fill in with a black nail polish. Lastly add a large white dot and a little dot slightly away from the first for a reflection and you are done :D:D

Apply your top coat and you have your dragon inspired manicure :D:D:D

Share Your Thoughts! 😀

X x x
Summer Colour Combination 2017

Hi Hi! 😀

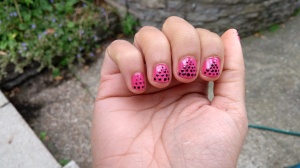
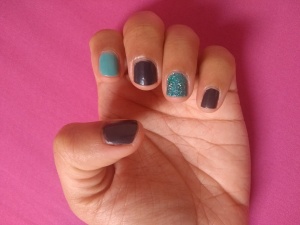
Well funny enough I feel that these two colours work pretty good in some way. I decided to do a polka dot pyramid 😀

summer colour combination 2017

I have used Rita Ora’s Rimmel 60seconds Super Shine Neon Fest Please click link for review-https://theheartofnails.wordpress.com/2017/07/11/rita-oras-rimmel-60secs-super-shine-nail-polish-review-neon-fest

and

Rimmels 60seconds Super Shine Black out

Share Your Thoughts! 😀

X x x 

Rita Ora’s Rimmel 60secs Super Shine Nail Polish Review Neon Fest

Hi Hi! 😀

I have enjoyed using Rita Ora’s previous nail polish from Rimmel and decided to try this one.

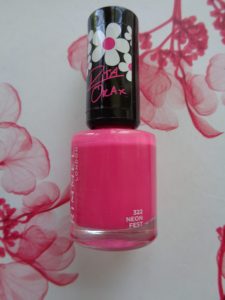
First LookRimmel Neon Fest Nail Polish Bottle

The nail polish bottle is round and clear and has a black lid with white flowers and Rita Ora’s name. The nail polish is cream and a bright pink.

The Nail Polish I tried

I tried Neon Fest 8ml


My Experience

I applied this nail polish and it was really nice. The thickness wasn’t too much and the thick brush made it easy to get the whole nail painted in three swipes. The nail polish was opaque in one coat and didn’t take too long to dry.

My Thoughts

I really like this nail polish. The colour is very pretty and works well for any time but especially summer time. Quick drying time and opaque in one coat makes applying this nail polish extremely quick and pleasant.

Overall

I give this nail polish 10/10. £2.99 price, quick drying time and quick to apply. What more could you want 😀

Share Your Thoughts! 😀

X x x

My Nail Art: Hippy Flower

Hi Hi! 😀

Well I was thinking of flowers so here we are ;0P

What you need: hippy flower nails

Basecoat

Top coat

Green nail polish

Red nail polish

Orange nail polish

Yellow nail polish

Dotting Tool/ Brush

First step is the basecoat. I used to two coats of Barry M Basecoat, Top coat and Nail hardener.

Wait to dry!

Now for the base colour which is your green nail polish. I chose Etude House Home made Jam #5 Green tea (please click link for review https://theheartofnails.wordpress.com/2016/11/22/etude-house-handmade-jam-nail-polish-review-green-tea)

Wait to dry!

Next for the flower. Using red nail polish and a thin brush or dotting tool shape a 5 petal flower. I used Collection Work the Colour Lady in Red.

Wait to dry!

Now paint inside the of the flower. I used orange Rita Ora’s  Rimmel Tangerine Tent and a dotting tool. I also applied yellow for the centre of the flower using a large dotting tool and Rimmel 60secs super shine Chin up Buttercup.

Last step I use the top coat and I was done 😀

Share Your Thoughts! 😀

X x x

My Nail Art!: Chick Wallpaper (Easter)

Hi Hi! 😀

Icame in from work and decided on this 😀 It reminds me of wall paper hence the name ;0P (yeah I used hence lol)

What you need:

Base coat

Top coat

Pink nail polish

Yellow nail polish

White nail polish

Black nail polish 

Orange nail polish

Dotting tool/nail art pen

What to do:

First step apply your base coat. I used two coats of Barry M Basecoat, Top coat and Nail Hardener.

Wait to dry!

Now for  the background/base colour, I chose pink but you can choose whatever you like. I used two coats of Selena Gomez’s Nicole by OPI  Naturally.

Wait to dry!

Now for the chicks. Using a small dotting tool and yellow nail polish make two dots close together, one slightly below and to the right of the first to make the body. I used Rimmels 60secs Super Dry Chin up Buttercup. While it dries make the beak using an even smaller dotting tool and an orange nail polish. I used Rita Ora’s Rimmel Tangerine Tent. 

The details now with your black nail polish and smallest dotting tool. I used Rimmel 60secs Black Out. Just make a small dot for the eyes and draw stick legs and you are done….

Well not quite… repeat all the above randomly all over your nails or just do one big one like I have done on the pinkie. Apply your top coat and you are done 😀

Happy Easter!! :D:D  

Share Your Thoughts! 😀

X x x
Nails of the Day: Inspired by Stay Glamrs- Split Swirl

Hi Hi! 😀 

I remember someone leaving me a comment about their nail art and I said I would give it a go. I was inspired by Asmi whose blog is Stay Glamrs.

Please click the link to get to her page and be inspired by the same nail art or read any of her other posts she has up, you won’t regret it 😀 https://stayglamrs.wordpress.com/2016/04/23/water-marble-nail-art-without-water/

Split Swirl

I thought I would give it my own name -Split Swirl 😛

I decided on an orange and black colour combination. I used Rita Ora’s Rimmel Tangerine Tent Please click link for review :https://theheartofnails.wordpress.com/2015/04/07/rimmel-60-seconds-super-shine-by-rita-ora-nail-polish-tangerine-tent-review

and Rimmel 60secs Black Out. I then applied a glitter polish Selena Gomez’s Nicole by Opi Inner Sparkle. Please click link for review:https://theheartofnails.wordpress.com/2016/02/16/nicole-by-opi-selena-gomez-nail-polish-inner-sparkle-review

I had to be careful with lighting as the glitter was showing up  so it’s a bit dark :0( 

I like the way it turned out its almost like a Halloween night out type of look 😀

Share Your Thoughts! 😀

X x xÂ