Nails of the Day!: Frosted Pink

Hi Hi! 😀

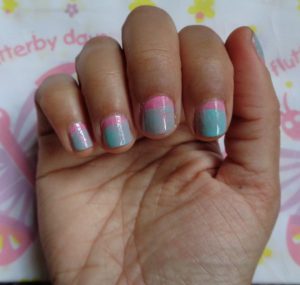
I decided on a nice little  pink manicure for today 😀

I used Selena Gomez’s Nicole by OPI Naturally as the base colour. https://theheartofnails.wordpress.com/2016/01/05/nicole-by-opi-selena-gomez-nail-polish-naturally-review

then I used Ruby Wing’s Cupcakes and Champagnes Sweet Cream on top  https://theheartofnails.wordpress.com/2015/05/12/cupcakes-and-champagne-ruby-wing-colour-changing-nail-polish-sweet-cream-scented and lastly I added a topcoat. I used Barry M’s Matte Topcoat

https://theheartofnails.wordpress.com/2016/05/24/barry-m-top-coat-review-matte/

Share Your Thoughts! 😀

X x x

Nails of the Day: Ice cream lolly

Hi Hi! 😀

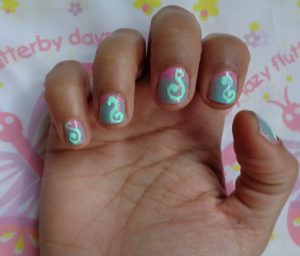
Decided to use some sheer nail polish and see what happen with some layering 😀Iceream lolly

I used Selena Gomez Nicole by OPI Naturally,

(please click link for review-https://theheartofnails.wordpress.com/2016/01/05/nicole-by-opi-selena-gomez-nail-polish-naturally-review

NSPA Fruit Extracts Mint Green and

(Please click link for review-https://theheartofnails.wordpress.com/2016/05/10/nspa-fruit-extracts-nail-varnish-review)

Cupcakes and Champagne Ruby Wing Sweet Cream

(please click the link for review-https://theheartofnails.wordpress.com/2015/05/12/cupcakes-and-champagne-ruby-wing-colour-changing-nail-polish-sweet-cream-scented)

Share Your Thoughts! 😀

X x x

My Nail Art: S for Summer

Hi Hi! 😀

I decided to recreate my nails of the day and add a little something 😀 

What you need:s for summer nails

Basecoat

Topcoat

Pink colour nail polish

Blue colour nail polish

Mint green colour nail polish

Glitter nail polish

Dotting tool

First step is the base coat I used two coats of Barry M Basecoat, Topcoat and Nail hardener.

Wait to dry!

Next using a light slightly sheer pink nail polish apply a coat of polish. I used Selena Gomez Nicole by OPI Naturally.

Wait to dry!

Now the blue nail polish is next and you have to start halfway way down the nail. NSPA Fruit extract Mint Green. I then applied the glitter on top. I used Ruby Wing Cupcakes and Champagne Sweet Cream and applied it over the blue bit.

Wait to dry!

The last part is the “S”. I used a mint green and a dotting tool to make the “S”. I used China Glaze Highlight of my Summer. I made the “s” face opposite ways on alternate nails and made the ends of the “s” all curly.

Add a top coat and you’re done

Share Your Thoughts! 😀

X x x

My Nail Art! : Shimmery Hot Dogs

shimmery hotdogs nailsHi Hi! 😀

I have never had a hot dog but that’s probably because I don’t eat sausage but that doesn’t mean I can’t have them on my nails so here we go 😀

What you need:

Base coat

Top coat

Beige colour nail polish (shimmer/glitter)

Brown colour nail polish(shimmer/glitter)

Red colour nail polish

Yellow colour nail polish

Black colour nail polish

Dotting tool/nail art pen/ toothpick

First step is the base coat. I used to two coats of Barry M’s Base coat, Top coat and Nail Hardener.

Wait to dry!

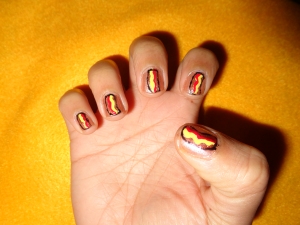
Next using you beige-y brown colour nail polish apply one coat. I used Collection 2000 Maxi Flex Bronzed. This is going to be your hot dog bun.

Next for your hot dog using a brown nail polish make a slightly curved sausage shape in the middle of your nail from the cuticle to the tip of your nail. I used Ruby Wing’s Cupcakes and Champagne Cinnamon Buns. Two coats! (I really need to invest in a nice brown nail polish ;0P). 

Wait to dry!

Mustard and Tomato ketchup. You will need a small dotting tool and your red and yellow nail polish. All you need to do is start from the top and make a wavey line down your hot dog. As you can see in the pic I alternated the side each “sauce” was on each nail. I used Collection Work the Colour Lady in Red and Rimmel 60secs Chin up Buttercup.

I noticed everything was blending in a bit so to make my sausage pop I used a black nail polish and a dotting tool to outline my hot dog. I used Rimmel 60secs Black out.

Lastly apply your top coat and you are done!! 😀

Share Your Thoughts! 😀

X x x

Nails Of The Day: It’s very Barbie-ish?

Hi Hi! 😀

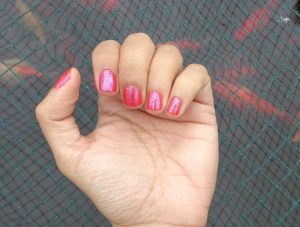
I showed these nails to my friends and the title is what they said to me so I decided it was the name for my post 😀

its very Barbie-ish nails 

I used Barry Ms Lolly Gloss Orange Fizz

https://theheartofnails.wordpress.com/2016/06/21/barry-m-lolly-gloss-nail-polish-review-orange-fizz-and-cherry-drop

and Ruby Wings Cupcakes and Champagne Doux on top

https://theheartofnails.wordpress.com/2015/05/19/cupcakes-and-champagne-ruby-wing-colour-changing-nail-polish-doux-scented

Share Your Thoughts! 😀

 X x x

My Nail Art: Basic Monster High Nails

Hi Hi! 😀

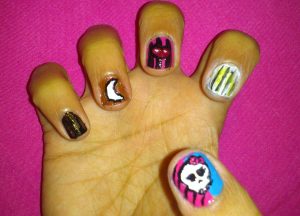
Decided to do a very easy nail art on Monster High 😀

What you need:basic monster high nails
Top coat

Basecoat

Black colour nail polish

Gold glitter nail polish

Brown nail polish(glitter)

White colour nail polish

 Dark pink colour nail polish

 Red colour nail polish

Yellow colour nail polish

Blue colour nail polish

 Dotting tools/ nail art pen/thin striper brush

First apply you basecoat. I applied two coats of Barry Basecoat, Top coat and Nail hardener.

Wait to dry!

Thumb/ Skullette logo

Using a dark pink and blue nail polish paint half of your nail. I used OPI Strawberry Margherita on the left side and Hello Kitty Playa. Use black nail polish and striper brush to make diagonal lines down the pink side of the nail. I used Rimmel 60secs Black Out.

Wait to dry!

Next using the white nail polish and a dotting tool try your best to make the shape of skullette. I used Color Club On Cloud Nine.

Wait to dry! 

Next using your dark pink nail polish make a bow shape on the right side of the skull. Lastly using a dotting tool and your black nail polish make the eyes and nose and outline the skull and the bow. Make sure to use your thin brush for the eyelashes.

Pointer Finger/ Frankie Stein

Using your white nail polish apply two coats of nail polish.

Wait to dry!

Next using a black nail polish and your thin striper brush make stripes from top to bottom. Don’t worry too much about it not being thick dark stripes as the idea is to make Frankie’s hair. I also used a yellow to add that slight lightening touch. I using Rimmel 60secs Chin up Buttercup.

Middle finger/ Draculaura

Paint your nail dark pink.

Wait to dry!

Using your black nail polish and your striper brush to make thick stripes top to bottom.

Wait to dry!

Next using a red nail polish make a lip shape. I used Etude House Berry Delicious Strawberry Soufflé Strawberry Jam. Then outline the lip.

Wait to dry!

Using a white nail polish make some fangs. 

Ring finger/Clawdeen

Using a brown nail polish pain your nail. I used Cupcakes and Champagne Ruby Wings Cinnamon Buns.

Wait to dry!

Next using a white nail polish and a dotting tool make the shape of a crescent moon and outline with black nail polish 

Pinkie finger/Cleo De Nile

Simply paint your nail black.

Wait to dry!

Add a gold glitter polish and you are done. I using Collection 2000 Hot Looks Shimmer Shake.

Apply your top coat and you are finished.

Share Your Thoughts! 😀

X x x

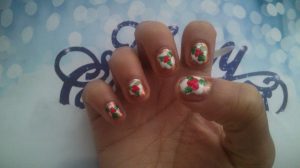
My Nail Art!: Birds Eye Christmas Puddings

Hi Hi! 😀

This is my Christmas nail art for this year 😀dsc_7071

What you need:

Basecoat

Topcoat

Brown colour nail polish

White nail polish

Red colour nail polish

Green colour nail polish

Dotting tool

First step is the basecoat. Two coats of Barry Ms Basecoat, Topcoat and Nail hardener.

Wait to dry!

First is your brown coloured nail polish. I didn’t have the right brown so I used two nail polishes. I used Collection 2000 Maxiflex Bronzed and I also used Ruby Wings Cupcakes and Champagne Cinnamon Buns.

Wait to dry!

Next is to make the icing. I used Color Club On Cloud Nine. I used a large dotting tool and made a wriggly circled shape.

Wait to dry!

Now for the holly .I used a small dotting tool and created three dots using my red nail polish. I used Collection Work the Colour Lady in Red. I then made the leaves using the same dotting tool and a green nail polish. I used Seventeen Colour Carnival Green Gold Shimmer. To make the leaves I just dragged he dotting tool side to side as I went upwards starting from the berries if that makes sense.

Last step is the top coat and you are done!!! 😀

Merry Christmas Pudding :D:D:D

Share Your Thoughts! 😀

X x x

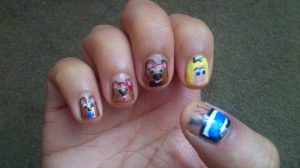
My Nail Art!: Goldilocks, the 3 Glitter bears and a big bowl of porridge

Hi Hi! 😀Goldilocks, the 3 glitter bears and a big bowl of porridge

I thought I would have a go at doing the goldilocks and the 3 bears on a bare nails instead of having a background like I normally do.

What you need:

Basecoat

Topcoat

Black colour nail polish

White colour nail polish

Blue colour nail polish

Grey/silver colour nail polish

Yellow colour nail polish

Peach/beige colour nail polish

Pink colour nail polish

Brown colour nail polish (glitter- optional)

Green colour nail polish

Red colour nail polish

Dotting tools/ nail art pen

First step is the basecoat. I am using two coats of Barry M Basecoat, Top coat and Nail Hardener.

Wait to dry!

Next starting with the thumb make the bowl of porridge. Start with your white nail polish and paint from your cuticle to half way up your nail, I used Color Club On Cloud Nine (2coats). While that dries make the spoon coming out of the bowl. I used a dotting tool and some grey nail polish from a collection of nail polish called Lumiere. Using a blue nail polish paint a stripe across the middle of the bowl to finish it off. I used Hello Kitty OPI My Pal Joey. Lastly outline the bowl with a black nail polish. I used a nail art pen then went over it with a dotting tool and Rimmel 60secs Black out nail polish. You can also outline the blue stripe if you wish.

For the Goldilocks nail (pointer finger)start of with a peach/ beige colour and paint in the middle of your nail just a little over halfway.  I used a peach colour from a collection of nail polish called Lumiere. While that is drying make the “Gold” locks with a yellow nail polish. I used a large dotting tool and Rimmel 60 secs Chin up Buttercup and a circling motion to try and make it look curly. For the face I used a white nail polish and a large dotting tool for the whites of the eyes, blue nail polish for the eyes, black for the pupils and a small dotting tool for the eye lashes. I also added a pink smile of a mouth using small dotting tool and Selena Gomez’s Nicole by OPI Naturally. Lastly I added a little black bow for the top of her head.

Papa bear nail (middle finger)I used two brownish nail polishes. I started off with Collection 2000 Maxiflex Bronzed and made the shape of a bear head using a large dotting tool. I also made this shape on my ring finger and pinkie while waiting for it to dry. I then used Cupcakes and Champagne Ruby Wing Colour changing nail polish Cinnamon Buns on top. For the ears I used a pink nail polish and a large dotting tool and placed a dot on the inside of the ears. The eyes I used white and a large dotting tool, the green (Etude House Handmade Jam Green tea) for the eyes and black for the pupils and nose. I added a black bow tie for papa bear, a red ear bow for mama bear (Etude House Berry Delicious Strawberry Soufflé Strawberry Jam) and a blue dummy for baby bear.

To complete this manicure add your top coat and you are done.

Share Your Thoughts! 😀

X x x

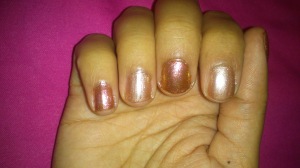
Autumn Colour Combination

Hi Hi!! 😀

I have a very subtle brown gold theme combination for Autumns Colour Combination 😀

Autumn Combination 2015

I have used Ruby Wing’s Cupcakes and Champagnes Cinnamon Bun and Collection 2000 Maxiflex Bronzed. I have a review on both:

https://theheartofnails.wordpress.com/2015/05/26/cupcakes-and-champagne-ruby-wing-colour-changing-nail-polish-cinnamon-bun-scented

https://theheartofnails.wordpress.com/2014/10/09/collection-2000-maxiflex-review

Share Your Thoughts! 😀

X x x

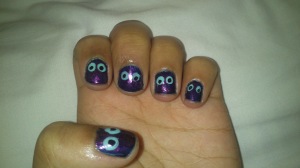
My Nail Art!:Eyes in the Mysterious Dark

Hi Hi!! 😀Eyes in the mysterious dark nails

This nail art is very simple 😀

It looks more purple in the photo then with the naked eye.

What you need

Basecoat

Topcoat

Dark blue nail polish

Light blue nail polish

Black nail polish

purple glitter nail polish

dotting tools/nail art pen

First apply your basecoat. I used two coats of Barry M Basecoat, Top coat and Nail Hardener.

Wait to dry!

Next use your dark blue nail polish. I used Collection 2000 Hot Looks Midnight.

Wait to dry!

Using the biggest dotting tool and the light blue polish make some very big eyes. I am using the light blue nail polish from a collection of 6 nail polish called Lumiere. Now using your black nail polish make two dots to complete the eyes. I used a nail art pen from Maybelline called Color Show Designer nail art pen.

Wait to dry!

Now for the mystery with some glitter. Apply one thin coat of a nice purple glitter polish. I am using Ruby Wings Cupcakes and Champagne Sweet Cream.

Once it’s dry you can use your black nail polish again to make the pupil stand out more and you are done.

Share Your Thoughts!:-D

X x x